How to Zoom In on CapCut (Detailed Guide)
I know how crucial it is to use the zoom-in feature on CapCut as it aids users in trimming and cutting their video clips accurately by allowing them to select and edit portions of the video precisely. However, many CapCut users encounter a common problem: they don’t know how to zoom in on CapCut, which can be a source of frustration and restrict the users from achieving their desired edits.
In this comprehensive guide, we’ll delve into the universe of CapCut zoom-in and out effects. Through our step-by-step guide, you’ll be able to master the art of the CapCut zoom-in effect in no time. From adjusting the zoom slider to utilizing keyframes, learning these techniques will empower you to take control of your video’s narrative, ensuring every detail is highlighted with precision.

How to Zoom In on CapCut (Step-by-Step Guide)
While CapCut offers a range of features that can aid you in creating and editing short videos, you can use the preset known as Zoom Lens effect to zoom in on a video in only one click. You can do this by following the given steps:
- First, open the CapCut app on your device and create a new project.
- Now, add the video or photo you want to use.

- Click the Effects option at the bottom and then hit Video Effects.

- From the Lens section, scroll down and select the Zoom Lens effect.

- Now, customize the speed and range by tapping the Adjust button.

- Tap the checkmark to apply the effect once you’re satisfied with the changes.

- You can hold and drag the edge of the effect to set the duration of the zoom effect.

- Once you’ve created your video, you can export it by clicking on the Export button at the top right corner.

How to Do Slow Zoom-In on CapCut?
- First, tap on the New Project button and import the video.
- Now, click the Edit option at the bottom.
- Position the play head at the specific point in the video where you’d like the zoom effect to commence.
- Hit the Keyframe option in the toolbar, shaped like a small diamond, to add the first keyframe.
- Scroll through the video layer and pause at the desired endpoint of the zoom and pan effect. Next, click the keyframe button to add another keyframe.
- Use a pinch gesture with your fingers on the screen to zoom in on the frame.
- Now, swipe the bottom toolbar to the left to locate and access the Graphs button.
- Hit the Graphs button to adjust the zoom speed. Keep in mind that a steeper curve corresponds to a faster zoom speed. You’ll need to flatten the curve to zoom in slowly.
- Once you’re happy with the changes, click on the checkmark button to save the edit.

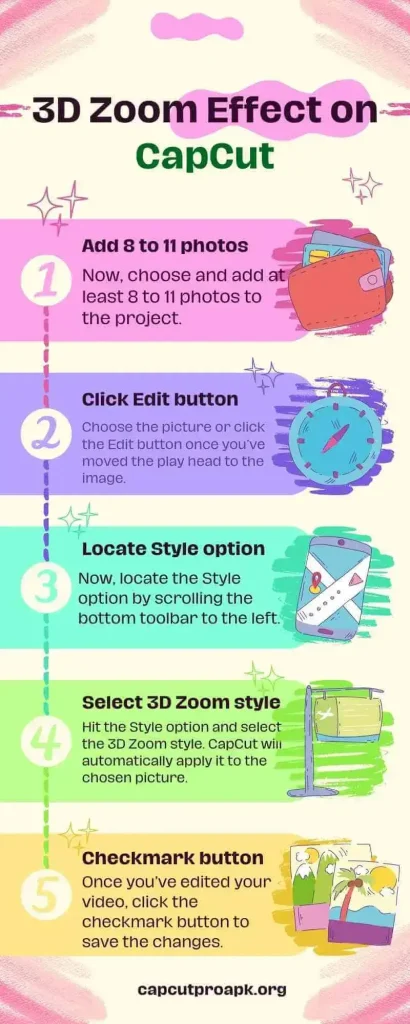
How to Do 3D Zoom Effect on CapCut?
You can also do the 3D trend on CapCut, which is very popular on TikTok. It involves zooming in on the specific object in the picture while pulling the background away to create a 3D appearance. Keep in mind that this effect is currently only applicable to images. However, you can do this by following the given steps:
- First, launch CapCut and create a New Project.
- Now, choose and add at least 8 to 11 photos to the project.
- Choose the picture or click the Edit button once you’ve moved the play head to the image.
- Now, locate the Style option by scrolling the bottom toolbar to the left.
- Hit the Style option and select the 3D Zoom style. CapCut will automatically apply it to the chosen picture.
- You can also adjust the duration of the effect by holding and dragging the edge of the picture.
- Once you’ve edited your video, click the checkmark button to save the changes.