How to Overlay in CapCut: Add Video and Picture Overlays
Adding overlays to the video is a superb idea as it enhances the overall aesthetics of the video. However, a common problem that many CapCut users encounter is they don’t know how to overlay in CapCut, or they struggle to integrate overlays into their videos seamlessly, which can lead to frustration and obstruction in their creative process. So, suppose you’re a person who wants to enhance your video’s overall quality, professionalism, and effectiveness but doesn’t know how to use the CapCut overlay feature. In that case, this guide is a must!
In this article, we’ll dive into the world of CapCut overlays, exploring their benefits and how they can change your video into visually appealing content. Within just a few steps, you will be able to master the overlay feature in CapCut. Whether it’s merging layers, adjusting opacity, or syncing overlays with the main content, conquering these techniques can transform your videos.
What is an Overlay for CapCut?
How to Overlay in CapCut for Video Element?
You can do video overlays in CapCut using Android or iOS devices by the following steps, the steps are mentioned below:
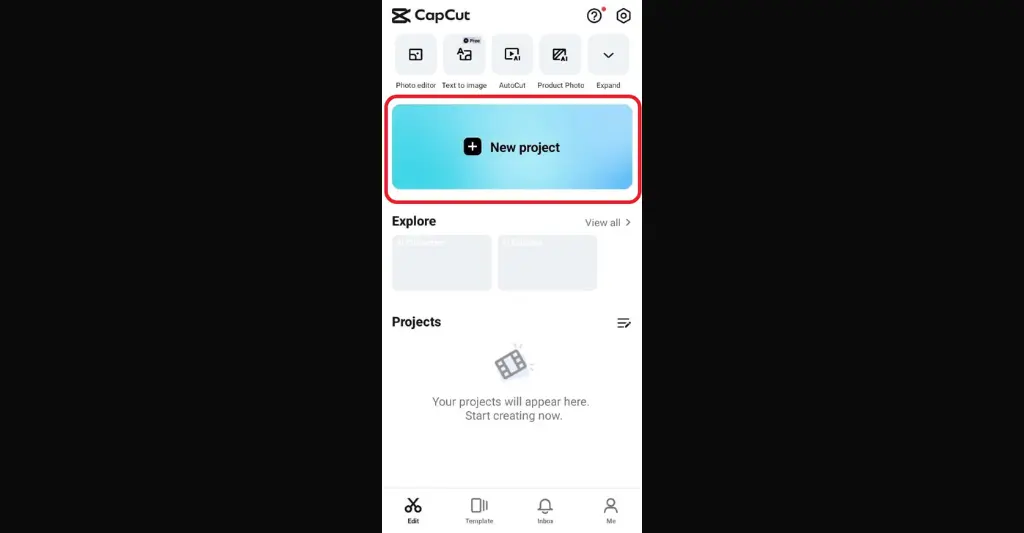
- First, open the CapCut video editing application and tap on the +New Project button to upload the background video for adding overlays.
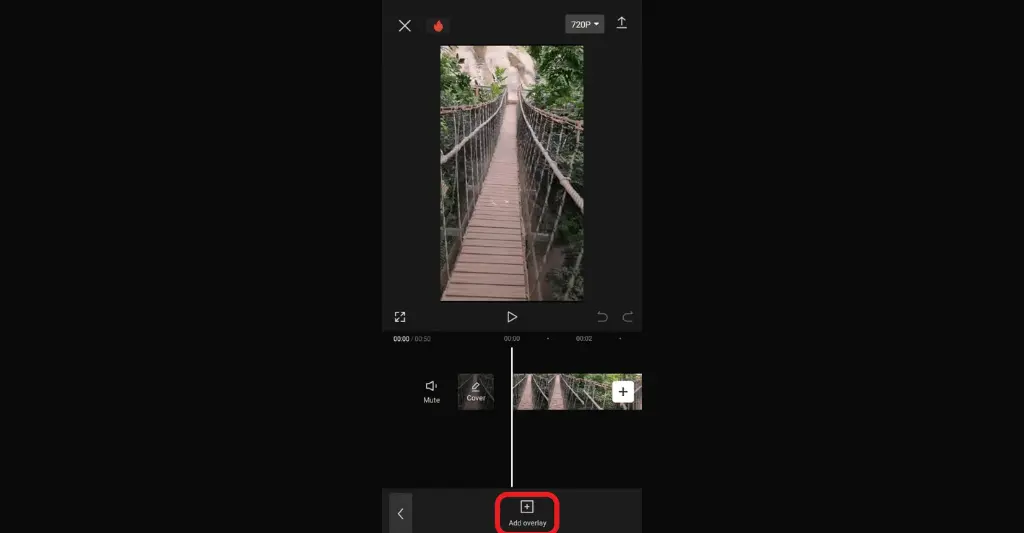
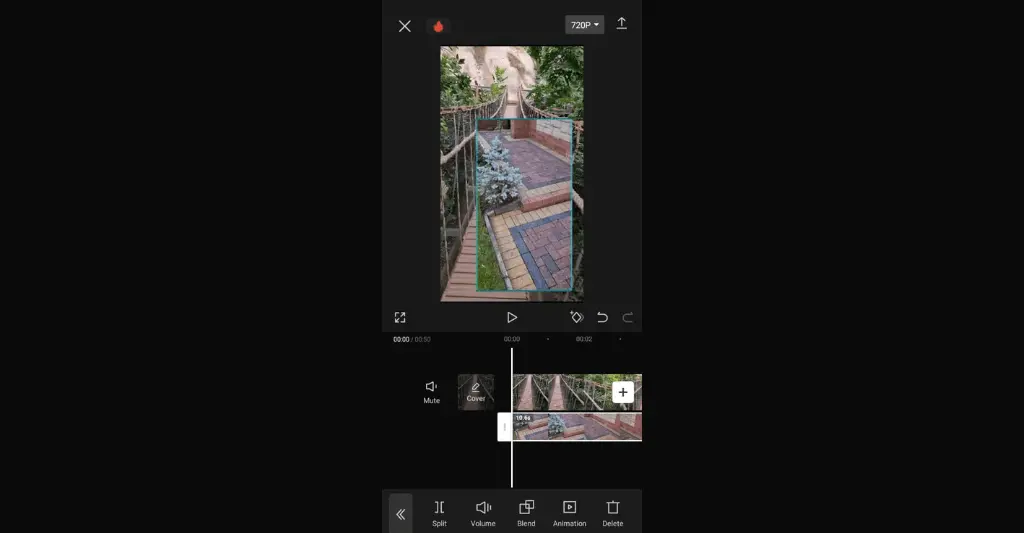
- Once you’ve imported the video, then tap on the overlay icon located at the bottom of your screen.
- Now click “Add Overlay” and choose the video from your device library.
- The overlay video will be presented at the top of the background video. You can also reposition and adjust the size of the overlay video by dragging and zooming.
- You also have the option to add a mask to your overlay video. Select “Mask” from the toolbar, and pick a mask style for your overlay video.
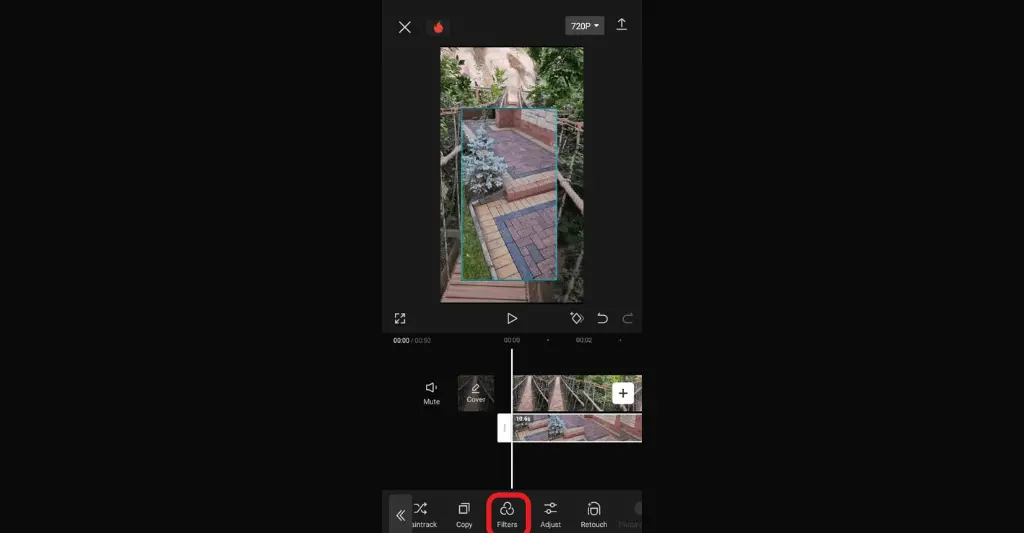
- You can add filters by clicking on the Filters option from the toolbar and picking the free filter you want to use. However, you can also use premium features for free by using the CapCut mod APK.
How to Add Text Overlay in CapCut?
You can also do a text overlay in the CapCut video editor using smartphones by the following given steps:
- Open CapCut on your smartphone and tap +New Project to import the background video you want to have an overlay on.
- Afterward, choose “Text” from the toolbar located at the bottom of the screen.
- Now, tap on the “Add Text” option to input text manually, or you can opt for Text templates, Auto captions, or Stickers to make text overlays.
- You can select various fonts, animations, and text styles to make your video tempting. Moreover, you can also modify the text overlay position by dragging it.

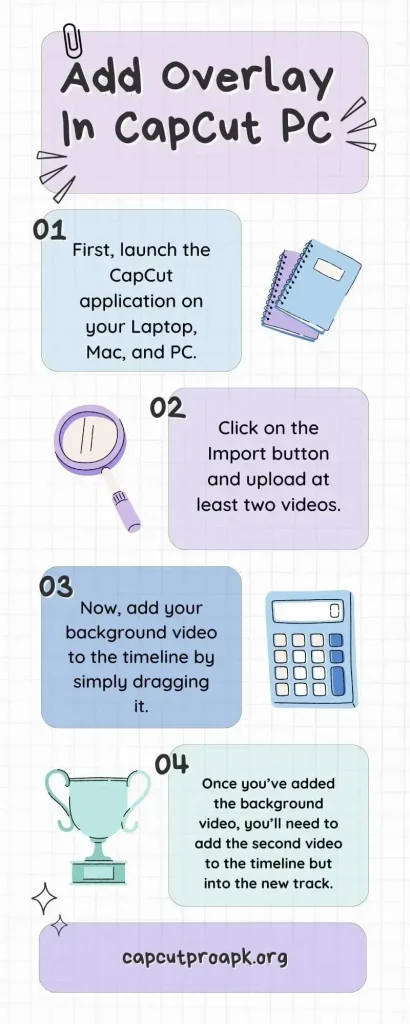
How to Overlay in CapCut on PC/Mac
You can add an overlay for video editing in CapCut by the following detailed steps: